Install a Duniter node
This document is a little guide to install & deploy your own Duniter instance to either:
- Participate writing the blockchain (you need to be a member)
- Have a mirroring node
Table of contents
Desktop or server
There are two versions of Duniter. Choose the wich most fits your needs.
Desktop version
A desktop machine will make it easier for you to manage your Duniter instance thanks to a graphical interface.
Your instance will be up as long as you keep your computer and Duniter software on. If you close your software or shut down your computer, Duniter will be able to resync with the network when you restart it.
Server version
For the most advanced users, a server install allows you to have a node up 100% of the time since a server is made to run forever.
You will control your instance using command line tools, but if you want you could also access the graphical interface using a web browser.
Once you are done with the installation, you can follow the command line user's guide.
GNU/Linux
Ubuntu/Debian 64 bits
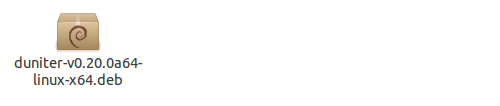
Download package
Go to the release page to get a link to the last stable release.
Choose the file you need:
- Files for Ubuntu and Debian are terminated by the
.debextension. - Choose either the file which name is containing
desktoporserverfor respectively desktop or server version. - Choose the file matching your architecture. If you don't know what it is, you probably need version x64.
Install Duniter
In order to process installation:
- If you are using Ubuntu, double-click on the downloaded file.
- If you are using Debian, open the downloaded file with
GDebioption:
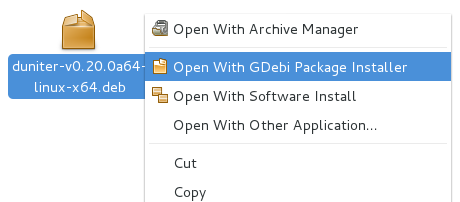
Note: you can also use the
dpkgcommand line to install the package. Example:
sudo dpkg -i duniter-*-linux-x64.debStart application
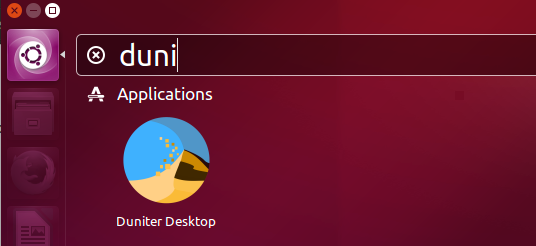
In order to start the desktop version:
- With Ubuntu, use Dash to look for Duniter and click on it to launch the software:
- With Debian, use GNOME Shell to look for Duniter and click on it to launch the software:
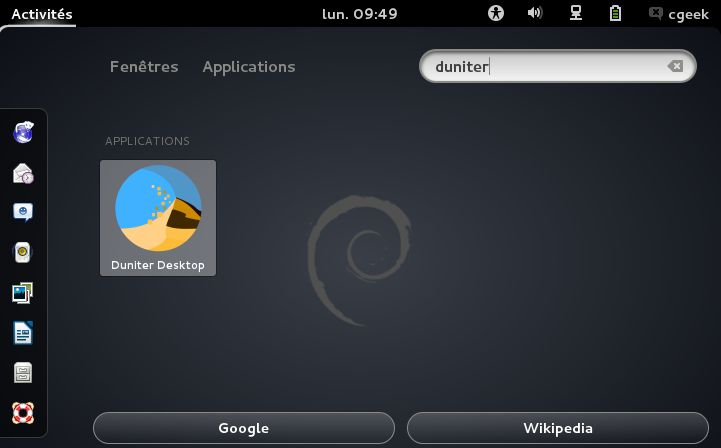
Note: it is also possible to start bureau version with the
duniter-desktopcommand. Using the command or the GUI is equivalent.
To launch the daemon (server version):
duniter startYou can follow the command line user's guide in order to use your server node.
The server version node for Ubuntu/Debian is usable with automatic startup (Systemd).
Gentoo 64 bits
In order to install Duniter on Gentoo, there is a package in the overlay sveyret-overlay. A README file can be found in this overlay to help you and add it to the Portage tree.
You will then be able to install the package net-p2p/duniter:
emerge -av net-p2p/duniterThe following USE flags allow you to decide what will be built:
| Flag | Description |
|---|---|
desktop | Build and install the desktop version instead of the server one |
gui | Add the GUI (mandatory for desktop version, add the web interface for server version) |
The server version node for Gentoo can also be automatically started.
YunoHost
A YunoHost package is available (server version only).
Other distributions
For other distributions, there is a binary file containing the desktop version.
-
Go to the release page to get a link to the last stable release and download the
duniter-desktopfile with.tar.gzextension. -
Extract the tarball:
tar zxvf duniter-*.tar.gz. -
Go to the extracted directory and run Duniter with
./nw.
Docker
Note: Docker must be installed on your computer in order to create a Duniter container.
Note: only the Duniter server version exists on a Docker image.
To get the image of the last version:
docker pull duniter/duniterIt is then possible to create the container with:
docker run -d -p127.0.0.1:9220:9220 -p10901:10901 -p20901:20901 --name duniter duniter/duniterWithout any other option, the container will automatically execute duniter direct_webstart. The -d in the command line make the container being executed in the background (daemon). The --name option is used to give a unique name to the container, which will then be easier to use for the next commands. The -p options are used to connect in-container ports with the host ones:
- port 9220 is for the web UI; specifying the IP address 127.0.0.1 (localhost) will prevent an external computer from accessing this node configuration.
- port 10901 is used for BMA access; exporting this port is then only necessary if you activate BMA.
- port 20901 is used for WS2P access.
Note : do not use both daemon options for Duniter and Docker (for example:
docker run -d duniter/duniter webstart) or the container will immediately stop.
Once the node is started, it is accessable either using web UI, going to http://localhost:9220, either using command line:
docker exec -it duniter duniter sync g1.duniter.fr:443In the above command, the first duniter is the name given to the container at creation time, while the second one is the executed command.
You can stop and restart the container using standard Docker commands:
docker stop duniter
docker start duniter
Volumes
The container creates 2 Docker volumes. The first one is attached to /etc/duniter and contains the Duniter configuration (see the keyfile chapter below). The other one is attached to the Duniter home directory /var/lib/duniter. This is the place the Duniter database will be stored.
You can specify where these directories must be mounted. This would be usefull in order for the data to persist even if, for example, you delete your container because you want to get a new version of the image.
For example, if you want the database to be stored on a duniter-db Docker volume, you may create the container using this command:
docker run -d -p127.0.0.1:9220:9220 -p10901:10901 -p20901:20901 --mount type=volume,src=duniter-db,dst=/var/lib/duniter --name duniter duniter/duniterIf you prefer the database to be stored on the host directory ~/duniter/data, you have to be carreful of the rights given to this directory. The commands to be executed are then:
chown -R 1111:1111 ~/duniter/data
docker run -d -p127.0.0.1:9220:9220 -p10901:10901 -p20901:20901 --mount type=bind,src=~/duniter/data,dst=/var/lib/duniter --name duniter duniter/duniter
Note: some of the above commands need “root” access, usage of
sudomay be required.
Using a keyfile
If the file /etc/duniter/keys.yml is found on the container, it is used as keyfile for the node identity. For this file is visible by Duniter, it must be granted appropriate access rights. If the file keys.yml is for example on the host in the ~/duniter/conf directory, here are the commands to execute for it is used:
chown -R 1111:1111 ~/duniter/conf
chmod -R 644 ~/duniter/conf
docker run -d -p127.0.0.1:9220:9220 -p10901:10901 -p20901:20901 --mount type=bind,src=~/duniter/conf,dst=/etc/duniter --name duniter duniter/duniter
Note: some of the above commands need “root” access, usage of
sudomay be required.
Manual building
Server version of Duniter can be compiled on the majority of Linux machines (32 bits or 64 bits) in just a few steps (first two should only be done once):
** Prerequisites **
At least, packages git and build-essential are required, you can install them by:
sudo apt-get update && sudo apt-get install git build-essential1. Node.js install
A tool can be used to install the wanted Node.js version and change as needed: its name is nvm.
You may install nvm with:
curl -o- https://raw.githubusercontent.com/creationix/nvm/v0.33.4/install.sh | bashYou can then install Node.js:
nvm install 8.9.1Note: for version older than Duniter 1.6, required Node.js version is 6.
2. Yarn install
Yarn may be installed by:
curl -sS https://dl.yarnpkg.com/debian/pubkey.gpg | sudo apt-key add -
echo "deb https://dl.yarnpkg.com/debian/ stable main" | sudo tee /etc/apt/sources.list.d/yarn.list
sudo apt-get update && sudo apt-get install yarn
3. Downloading Duniter
Go to the release page to get a link to the last stable release and download the Source code (tar.gz) file.
4. Start the installation from the uncompressed folder duniter/:
Note: do not launch these commands as
root. This won't work, we know it.
cd duniter
yarn
5. Use the Duniter commands by prefixing duniter with bin/. Example:
bin/duniter --version6. Add web interface (not added by default), to add direct_webstart et webstart commands:
bin/duniter plug duniter-ui@1.6.xNote: for Duniter 1.5.9 ou below:
bin/duniter plug duniter-ui@1.4.x
sed -i "s/duniter\//..\/..\/..\/..\//g" node_modules/duniter-ui/server/controller/webmin.js
Automatic startup
Automatic startup is only available on server versions.
Since version 1.6.15, automatic statup scripts are delivered for distribution based on Systemd or OpenRC.
In order for the node to be automatically launched at computer startup, execute the following command with administrator rights (sudo):
-
for Systemd:
systemctl enable duniter.service -
for OpenRC:
rc-update add duniter default
By default, the server will start as duniter user in the directory /var/lib/duniter.
You can customize the service behavior:
-
for Systemd, using drop-ins — for example, in order to start with web interface, you can create a file named
/etc/systemd/system/duniter.service.d/10-web.confwith the following content:[Service] Environment="DUNITER_WEB=web" -
for OpenRC, by modifying the
/etc/conf.d/duniterfile.
Adjustable environment variables for this service are:
| Variable | Type | Description |
|---|---|---|
DUNITER_WEB | Systemd | Must be empty for classical startup, or web to start the web interface |
DUNITER_WEB | OpenRC | Start web interface if the value is defined an evaluate to true (yes, for example) |
DUNITER_HOME | all | Server file location, default: /var/lib/duniter/.config/duniter |
DUNITER_DATA | all | Name (location) of the database, default: duniter_default |
DUNITER_KEYS | OpenRC | If this variable is defined, it must indicate the location of a key file for node identity |
DUNITER_WEB_HOST | OpenRC | This variable allow to modify default host name for web interface |
DUNITER_WEB_PORT | OpenRC | This variable allow to modify default port for web interface |
DUNITER_GROUP | OpenRC | Name of the group with which node is executed, default: duniter |
DUNITER_USER | OpenRC | Name of the user with which node is executed, default: duniter |
DUNITER_OPTS | Systemd | Any other option to be given to command line at startup |
DUNITER_SSD_OPTIONS | OpenRC | Any other option to be given to start-stop-daemon command line |
Note: up to version 1.6.17 (Systemd) or 1.6.22 (OpenRC), default value for
DUNITER_HOMEwas/var/lib/duniter.
Windows
There is no Windows-specific version anymore. To deploy a node on a Windows machine, there are two possibilites:
- Use Docker
- Windows Subsystem for Linux (WSL): no instructions available yet
MacOS
There is no specific MacOS version. However, you still can build the server version.